| Simple Paper Craft Projects You Can Try Right Now15 June 2020 | Laura
Sometimes it is hard to know where to even start with paper craft projects, there are so many choices of tutorials and many of them require specialised equipment such as die cut machines or a large supply of different papers. In this blog post, I'd like to show you three simple projects you can try with any paper type, which only require scissors and glue to get started! And the real beauty is that once you have mastered them you can go on to experiment with using different paper finishes and variations in the sizes and/or cutting to create your own version!
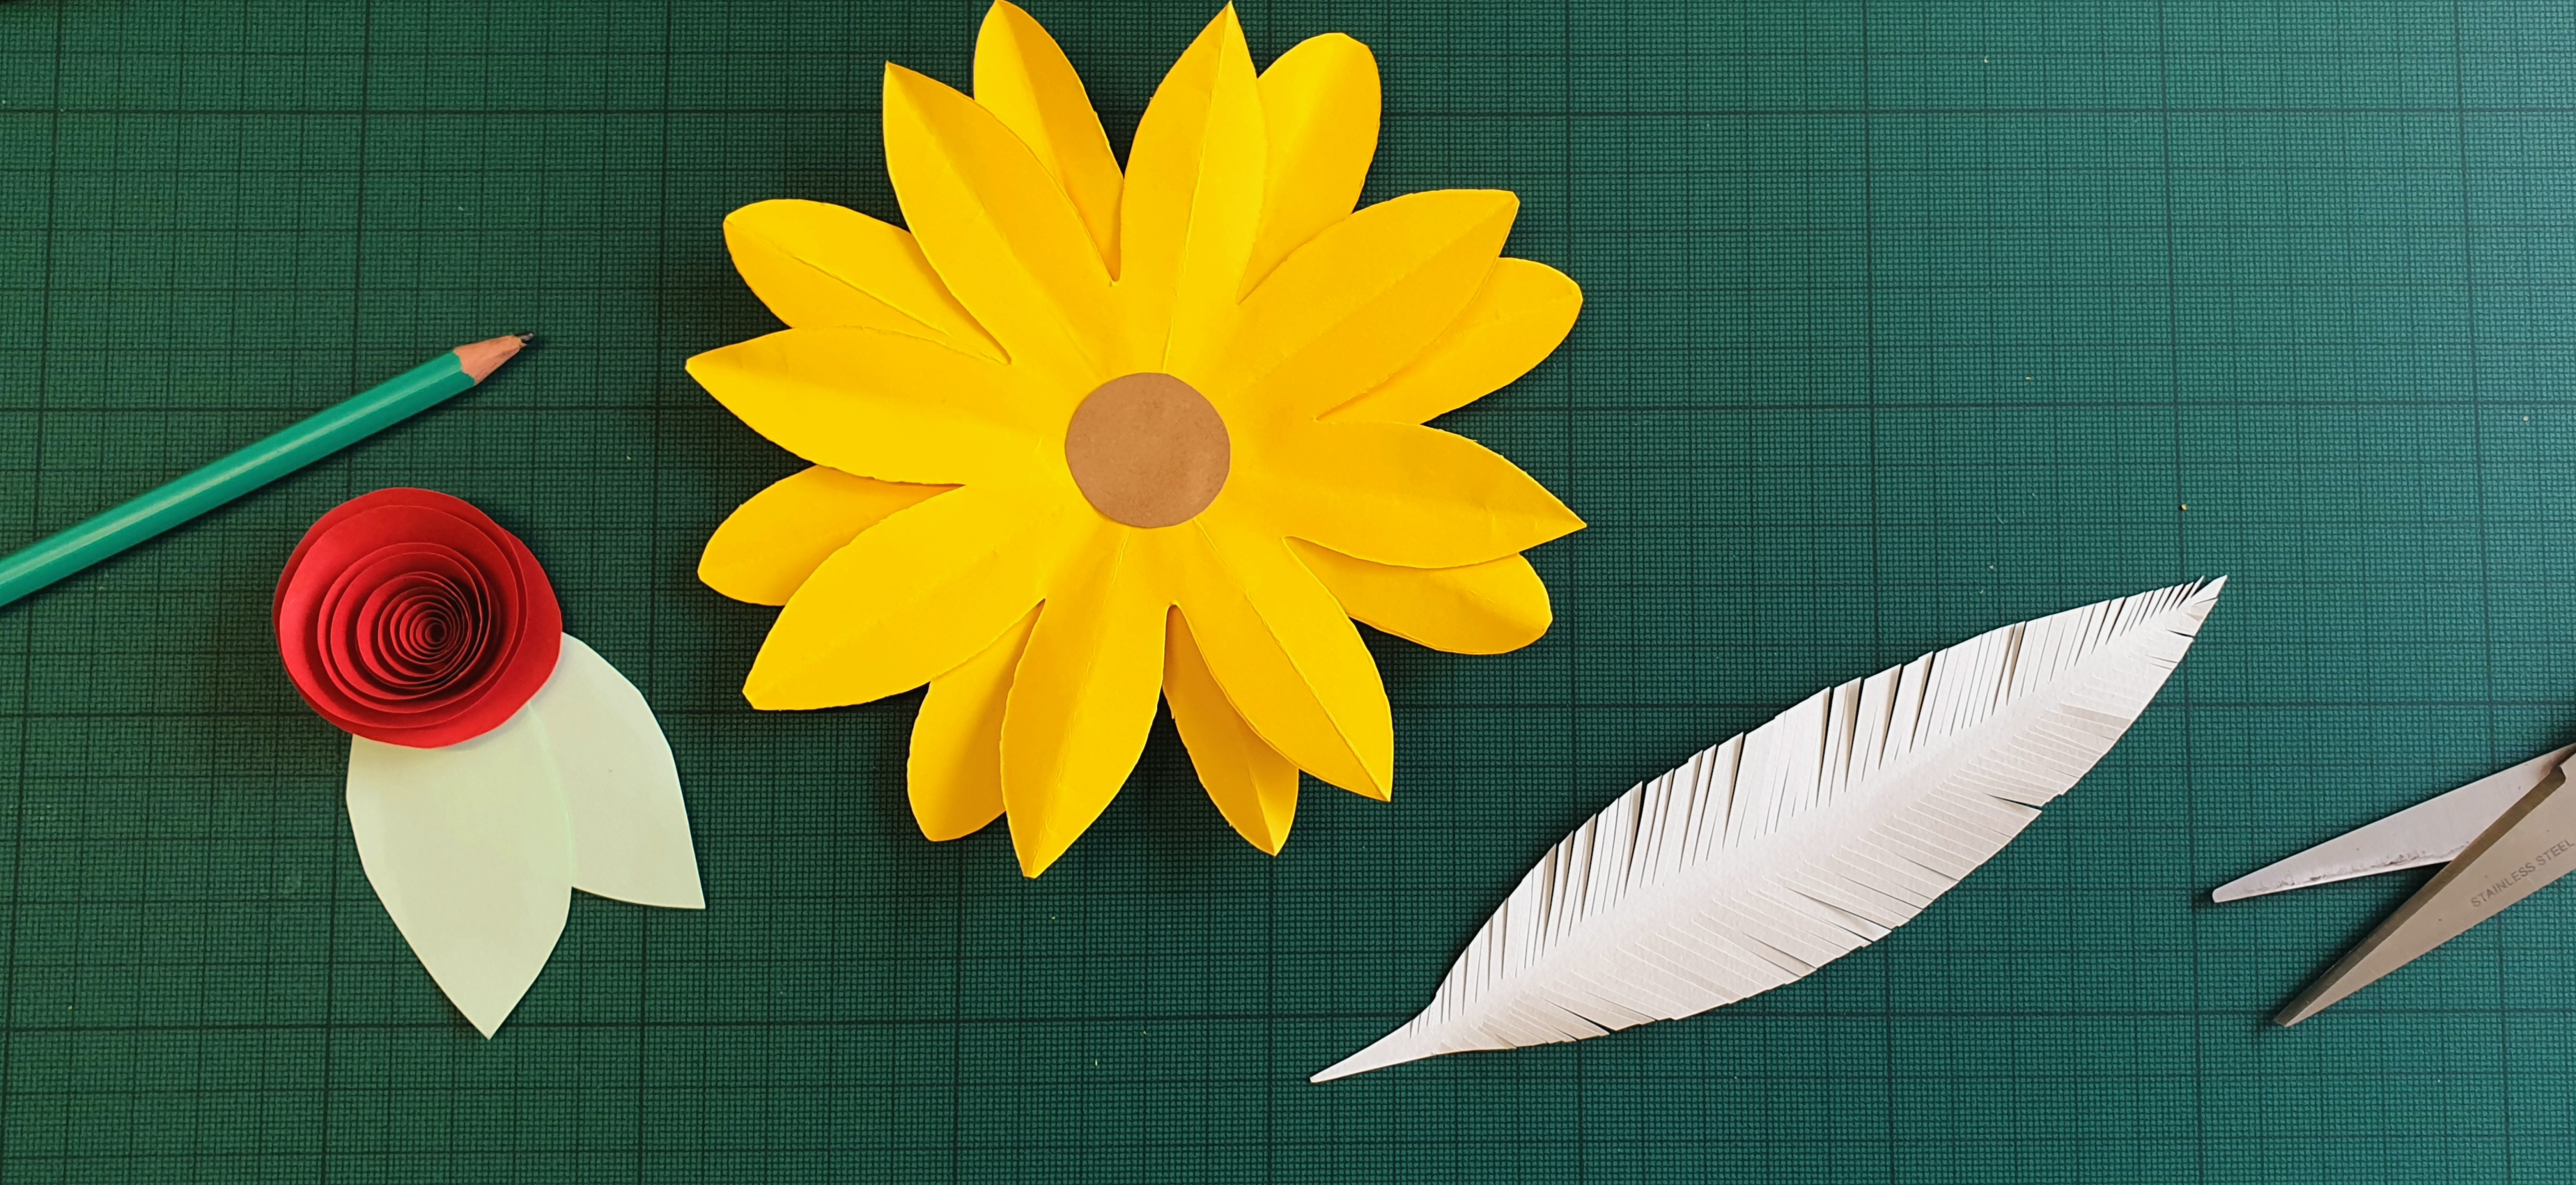
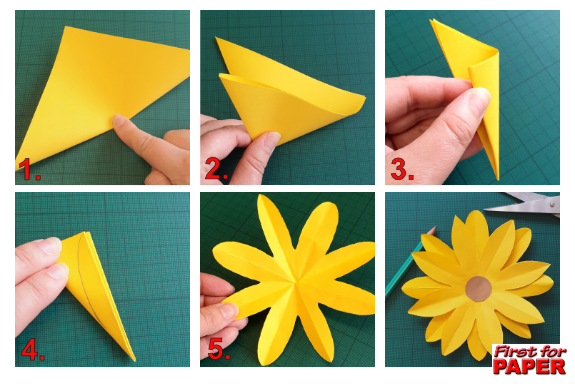
Eight-petalled Flower This simple 8 petalled flower is so easy it's great even for children, but still so effective! For this I have used Rapid Colour 120gsm in the Goldcrest Yellow shade, with the Nougat Brown 120gsm in the same range for the flower centre.
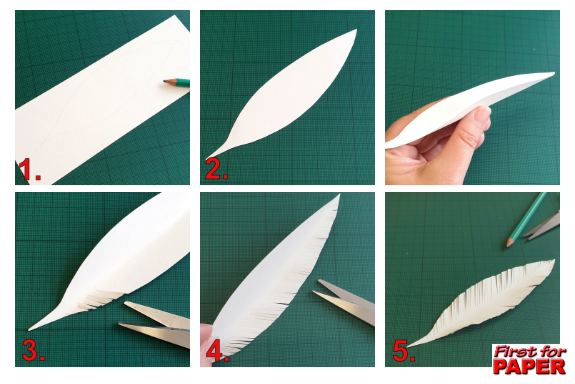
You could vary this design by experimenting with different petal shapes. Feather Feathers are often thought of as representing a connection to the spiritual realm, so are often used in memorial pieces. This very simple design (shown here in 140gsm Natural shade in our Cumulus range) uses just cutting and folding to create a beautiful feather. Make sure to take your time with the cutting and try and evenly space the cuts for maximum effectiveness.
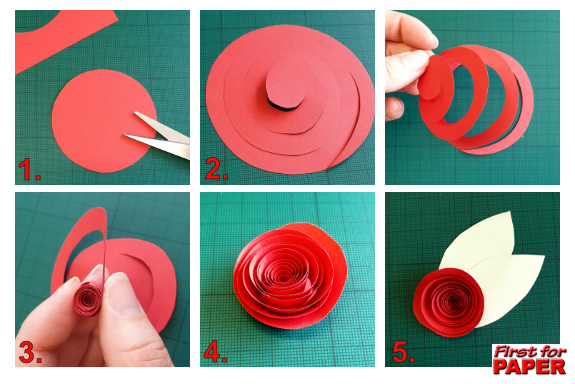
This design would be lovely in scrapbooking or as a decoration in a box frame. Spiral Rose Roses are always timeless and this simple spiral design can be done in any lightweight paper stock that you choose. I opted for 120gsm Bright Red shade in our Colourset range.
I hope these ideas inspire you, please let us know either in the comments or on our Facebook page if you tried them out and share pics if you'd like to! Happy Crafting! |
|


Customer Services Information Our Partner Sites © 2014 - 2024 First for Paper. All rights reserved |

